
Intro
Building the perfect outdoor shower provides many benefits to a home. An outdoor shower provides an area to wash off sandy feet after a trip to your favorite beach, a rinse after taking a dip in the pool or even just an area to cool off on a hot summer day. Having a nicely designed outdoor shower and landscape area can also increase the value of your home. While the ranges vary, many in the real estate industry have claimed increased values between 5 and 11 percent are typical. In some cases it has been said that landscaping can improve a home’s value up to 20 percent!
Design Brief
The first and most important step in building the perfect outdoor shower is determining the area and design. There are a lot of factors to consider when choosing the location of the shower including the drainage, proximity to existing hot and cold water plumbing and overall aesthetic desire. Listed below are a few links that will help you get some design ideas and inspiration:
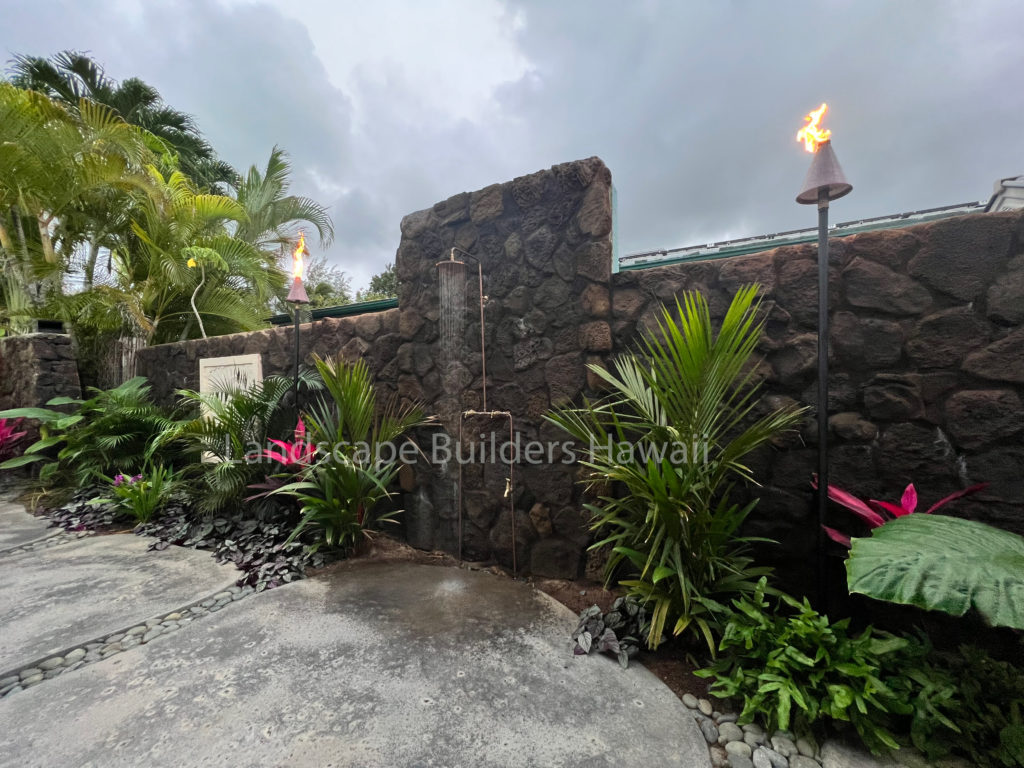
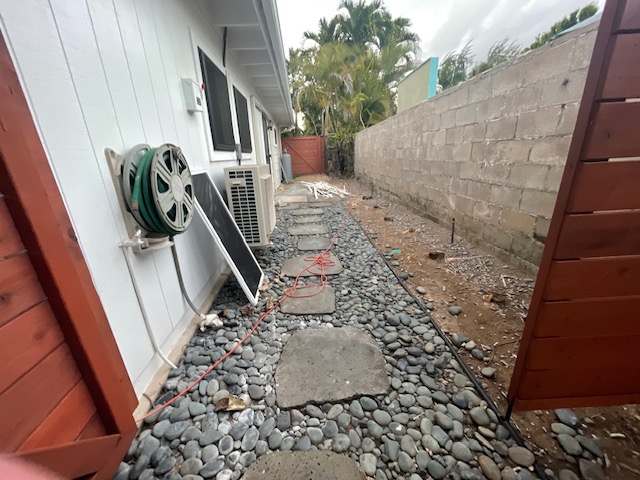
In the project featured, Landscape Builders Hawaii worked with the client to design a South Asian/Balinese style garden with the outdoor shower as a focal point.The existing side entrance to the home was outdated and tired with a neighboring concrete masonry unit (CMU) block wall unfinished, minimal to none landscaping, tough to navigate stepping stones and also a large shower wall on the neighbor’s side which created an eye sore in the very open view plane. Some priorities to the new design included an outdoor shower with a feature to help block the backside view of the neighboring shower wall, large format free form concrete pavers, tiki torches, moss rock veneer to cover CMU block wall and lush tropical plants with complimentary colors to the area.
Steps
- Finalize design, determine style of shower
- Demolition of existing site conditions (concrete, stepping stones and river rock)
- Trench gas, hot and cold-water lines (follow local building code and guidelines always)
- Hire a licensed plumber to install pipes to shower area
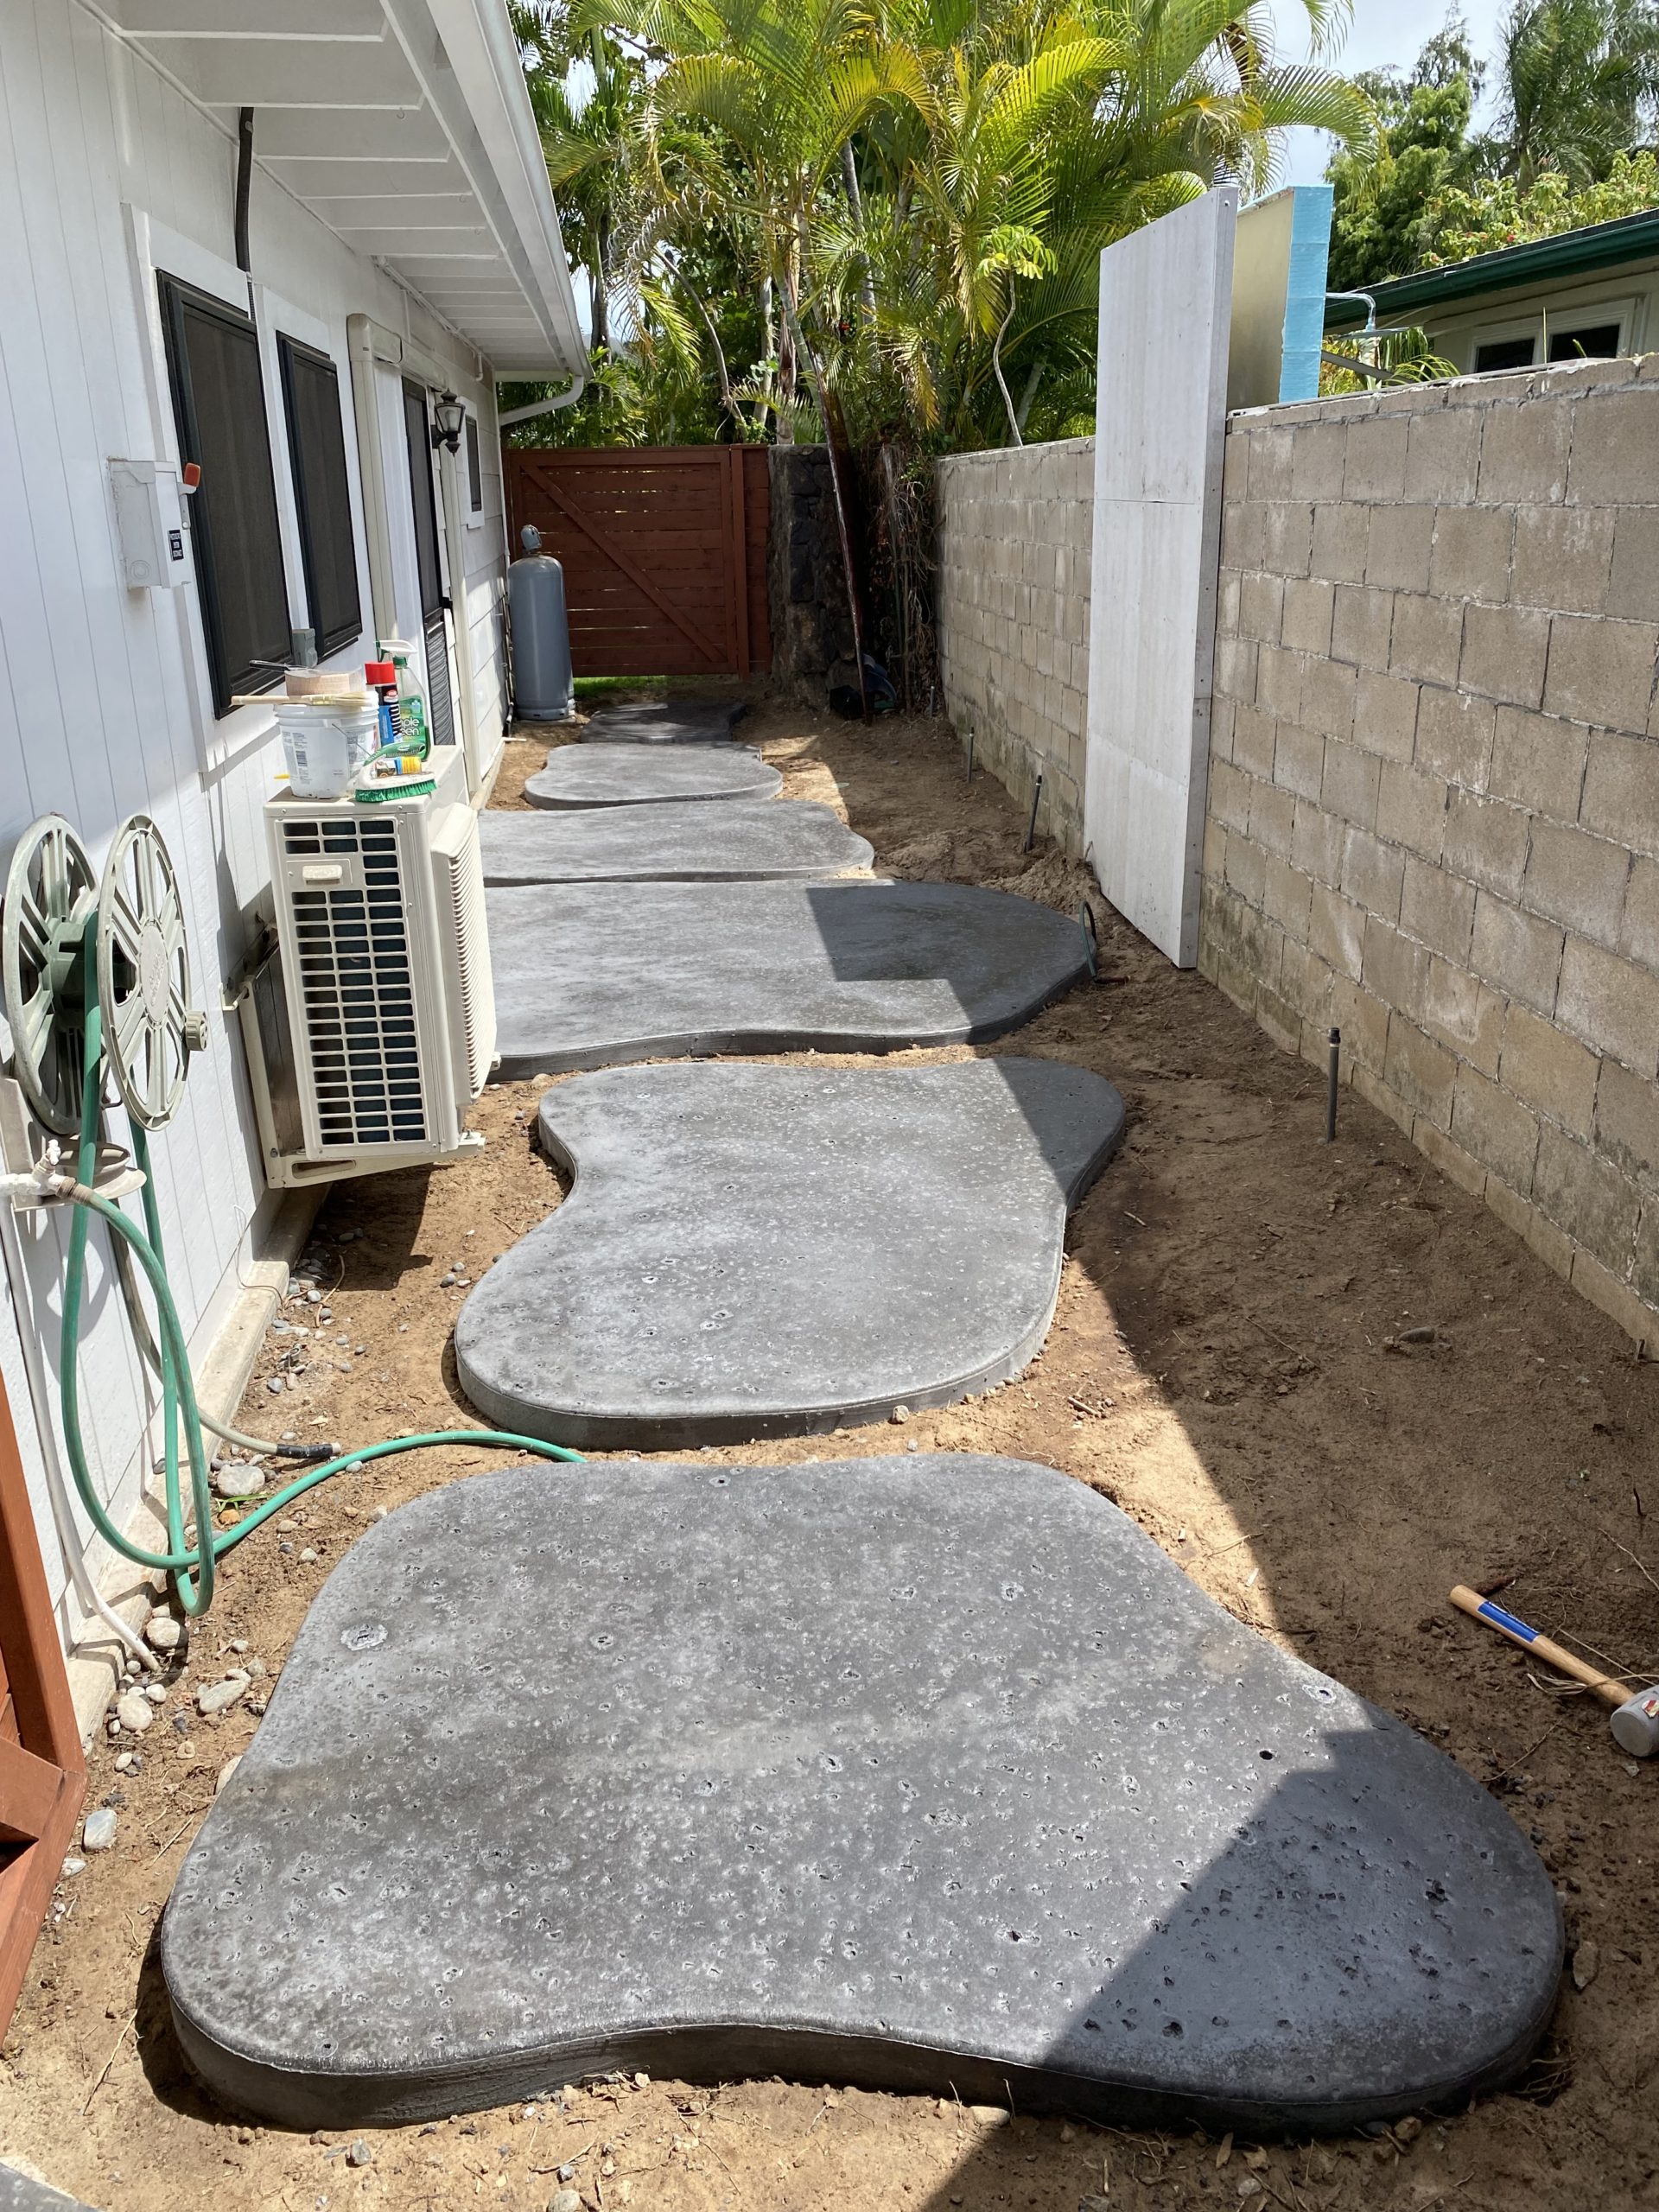
- Build concrete forms to the planned design using the necessary materials. For this project the client wanted large free form shapes so recycled plastic landscape edging material was used to form radius because of its bending ability
- Place, pour and finish concrete to desired finish – integrally colored concrete was used on this project with a rock salt finish to resemble basalt stone. (Smoke Stack color by Master Builders)
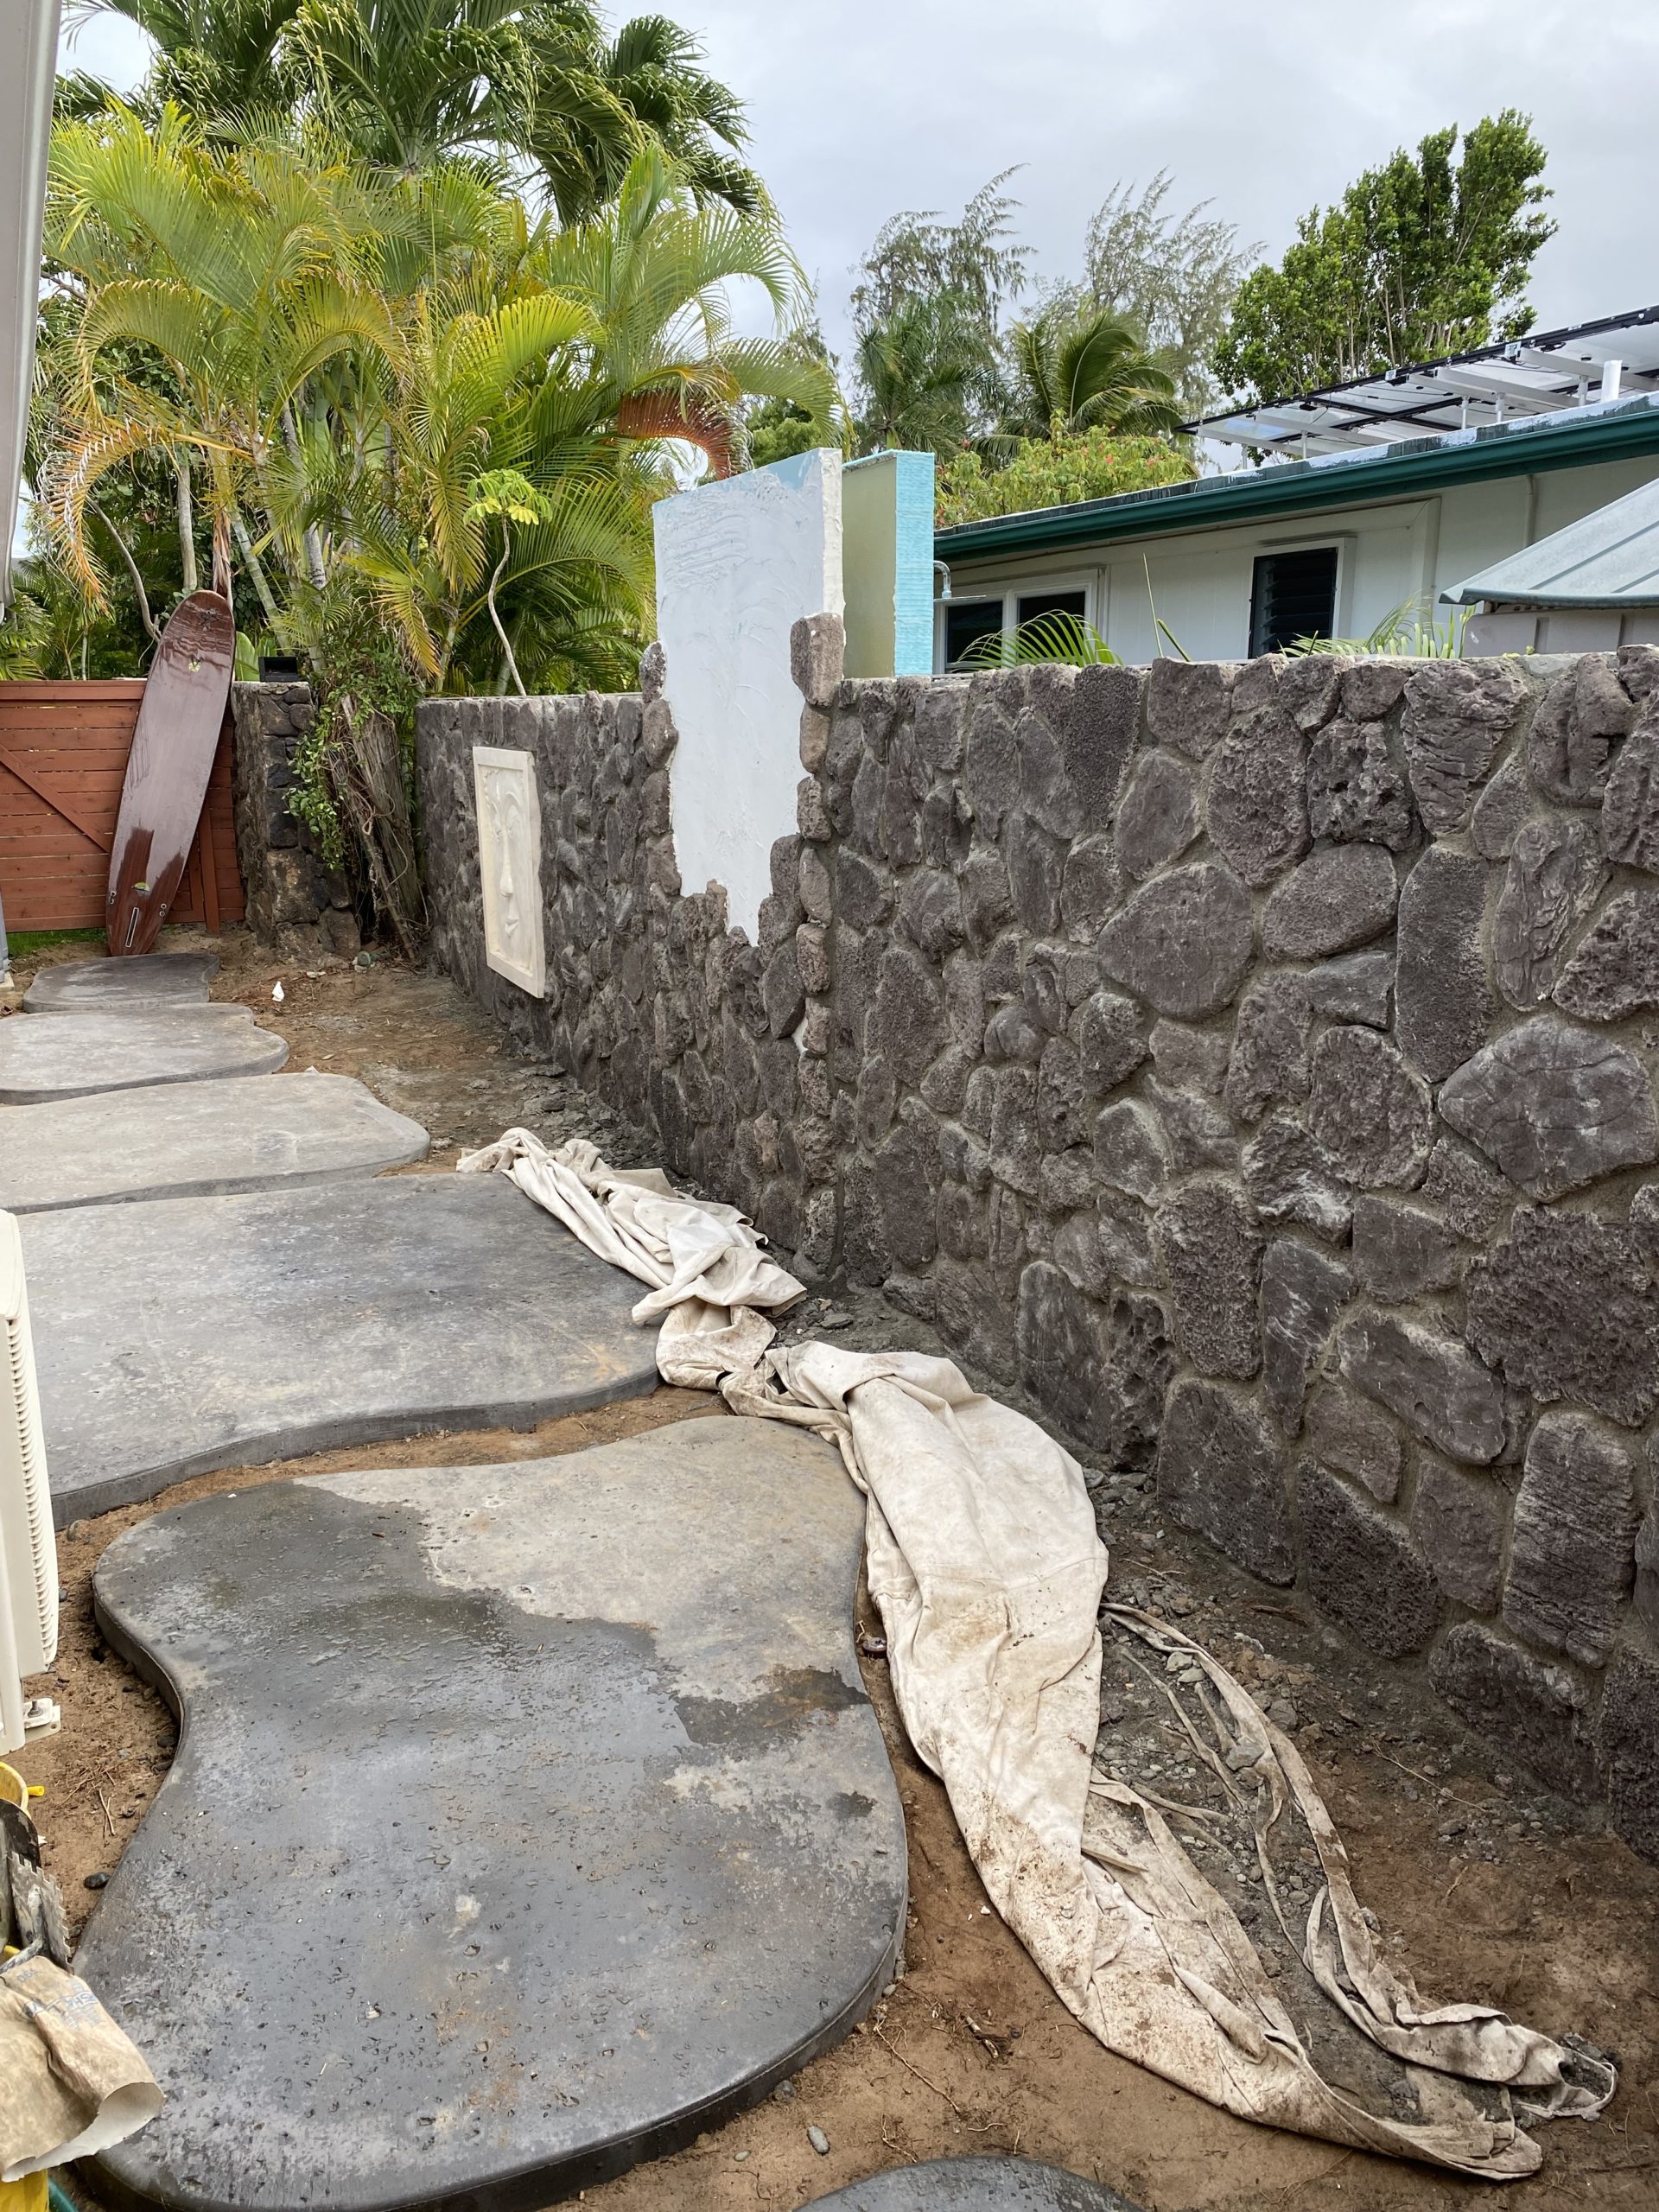
- Furr Out existing CMU block wall where a new shower will be installed. The new portion of shower wall was built using pressure treated lumber cladded with James Hardie cement board and then waterproofed with a liquid membrane
- Install moss rock veneer using a skim coat base on existing wall and sand/cement mixture for attaching individual pieces of rock veneer
- Install Tiki Torches (always use a licensed plumber and follow manufacturer installation guidelines)
- Mount shower fixture (step 3&4 could also be done at this point but were completed earlier in this project due to site accessibility before concrete was poured which would have made trenching more difficult)
- Source and installation of planting materials (Be mindful to pick plants that can coexist in a wet environment in the immediate area of the shower)
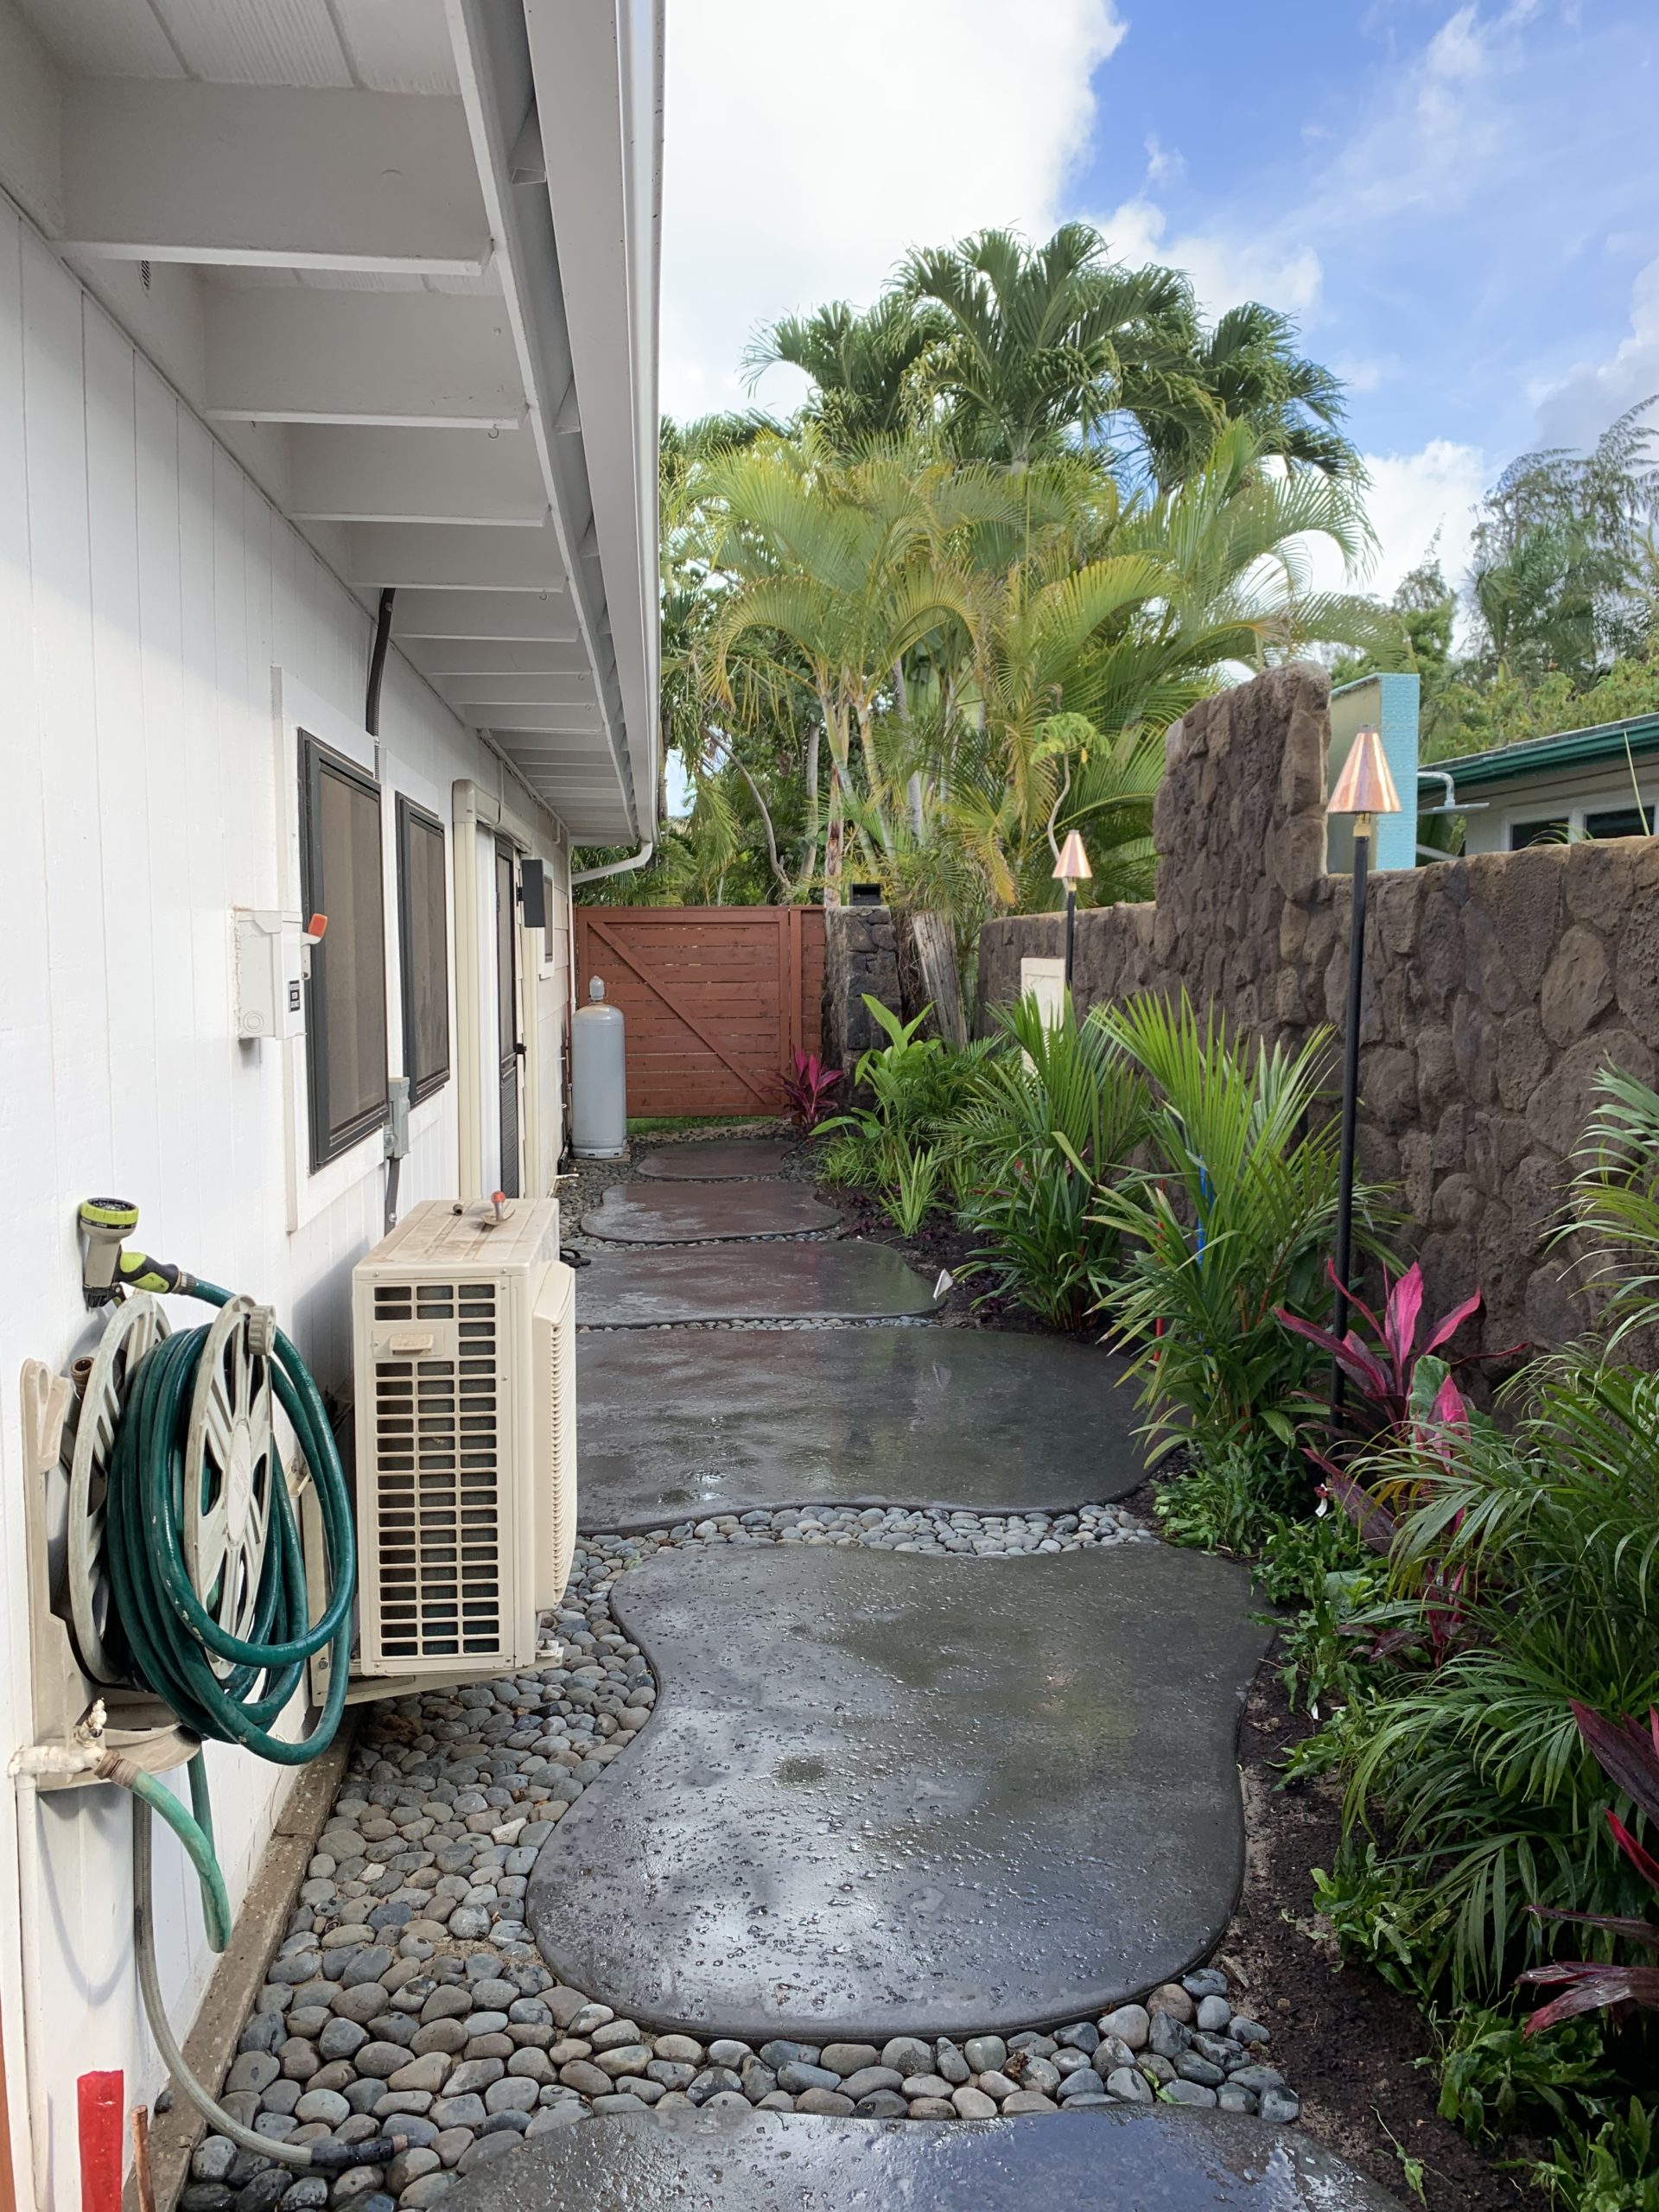
Pro Tip – This project was in a very sandy area where surface water drains very well. The concrete was sloped to provide drainage from the shower away from buildings and structures and slowly percolate on its own. In different soil conditions and environments, you may need a drainage system.